This Photoshop tutorial teaches you to create a web button.
Step 1: In this tutorial we will learn how to design a "Web Button".
Step 2: First of all we will open a new file in Adobe Photoshop. Well create a new 350px by 200px document with a white background, and reset your background foreground colors to default (i.e. black white).
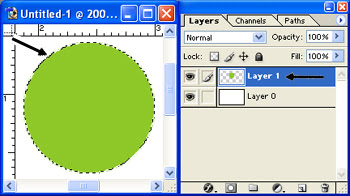
Step 3: (Add new layer) By using marquee tool  make this object.
Step 4: By alt + backspace fill this color = # 8DC827.
Step 5: (Add new layer) By using marquee tool  make this object.
Step 6: By alt + backspace fill with black color.
Step 7: (Add new layer) By using marquee tool  make this object.
Step 8: Apply Gradient  effect :
Step 9: Decrease its Opacity:
Step 10: (Add new layer) By using marquee tool  make this object.
Step 11: By alt + backspace fill color = # 8EC231.
Step12: Copy it 4 times and place it in different areas:
Step 13: (Add new layer) Copy it once more.
Step 14: Now Decrease its Opacity upto 60%.
Step 15: (Add new layer) Copy it again but this time 2 times and fill it with this color = # EEBC05.
Step 16: Apply Stroke to this object settings are:
Step 17: (Add new layer) By using pen tool  make this object.
Step 18: Fill it with this color = # 8EC828.
Step 19: Apply Gradient  effect :
Step 20: (Add new layer) By using pen tool  make this object and fill it with this color = # C9E5AA.
Step 21: Now Decrease its Opacity upto 80%.
Step 22: Apply Stroke to this object settings are: .
Step 23: (Add new layer) By using pen tool  make this object.
Step 24: Fill it with black color.
Step 25: Copy the layer and place it on the opposite side after that press ctrl + t (for transformation) and right click, in the options click on Flip Horizontal.
Step 26: Apply Stroke to this object settings are:
Step 27: Now with the help of burn tool  try to make the areas dark where pointed:
Step 28: Select all layers not the last one and after selecting press ctrl + e to merge those layers:
Step 29: Press ctrl + t (for transformation) and make it larger.
Step 30: The final output.
skip to main |
skip to sidebar
Free Photoshop Tutorial, Illustrator Tutorial, 3D Studio Max Tutorial, Freehand Tutorial and Photoshop Brush
Followers
Labels
- 3D Studio Max (403)
- Adobe Illustrator (278)
- FreeHand Tutorial (20)
- News (7)
- Photoshop (2321)
- Photoshop Brush (8)


